How-To Guides
Did you know that any cloud-enabled VisiblAir sensor can be integrated with HomeAssistant? It's actually pretty simple and relies on the data the sensor sends to the cloud portal periodically.
To add your cloud-enabled VisiblAir sensor to your HomeAssistant server simply use the following YAML in the configuration.yaml configuration file:
rest:
resource: https://api.visiblair.com:11000/api/v1/sensor?uuid=YOUR_SENSOR_UUID&viewToken=YOUR_SENSOR_TOKEN
sensor:
- name: "VisiblAir Sensor CO2"
unique_id: a74e63a8-6312-4d72-aeef-152fd21af0c3
value_template: "{{ value_json.lastSampleCo2 }}"
unit_of_measurement: "ppm"
device_class: carbon_dioxide
- name: "VisiblAir Sensor Temperature"
unique_id: 887856eb-04e0-4858-a268-8af74979a486
value_template: "{{ value_json.lastSampleTemperature }}"
unit_of_measurement: "°C"
device_class: temperature
- name: "VisiblAir Sensor Humidity"
unique_id: b479e1a4-8c64-4a33-a3e6-e56e633320ee
value_template: "{{ value_json.lastSampleHumidity }}"
unit_of_measurement: "%R.H."
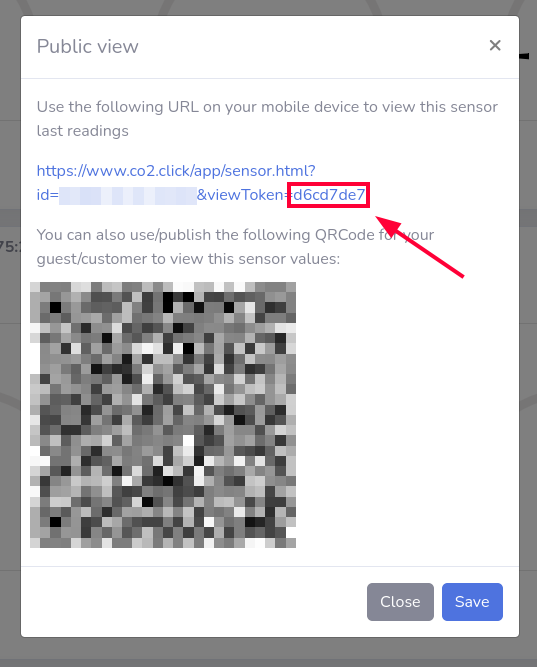
device_class: humidityReplace YOUR_SENSOR_UUID with your sensor UUID (Wi-Fi MAC address) and YOUR_SENSOR_TOKEN by the unique token. This token can be obtained from the portal by clicking the "Public view" icon:
Then in your HomeAssistant WebUI go to the "Developer Tools" and Click on "CHECK CONFIGURATION" to ensure that the configuration you added is valid:
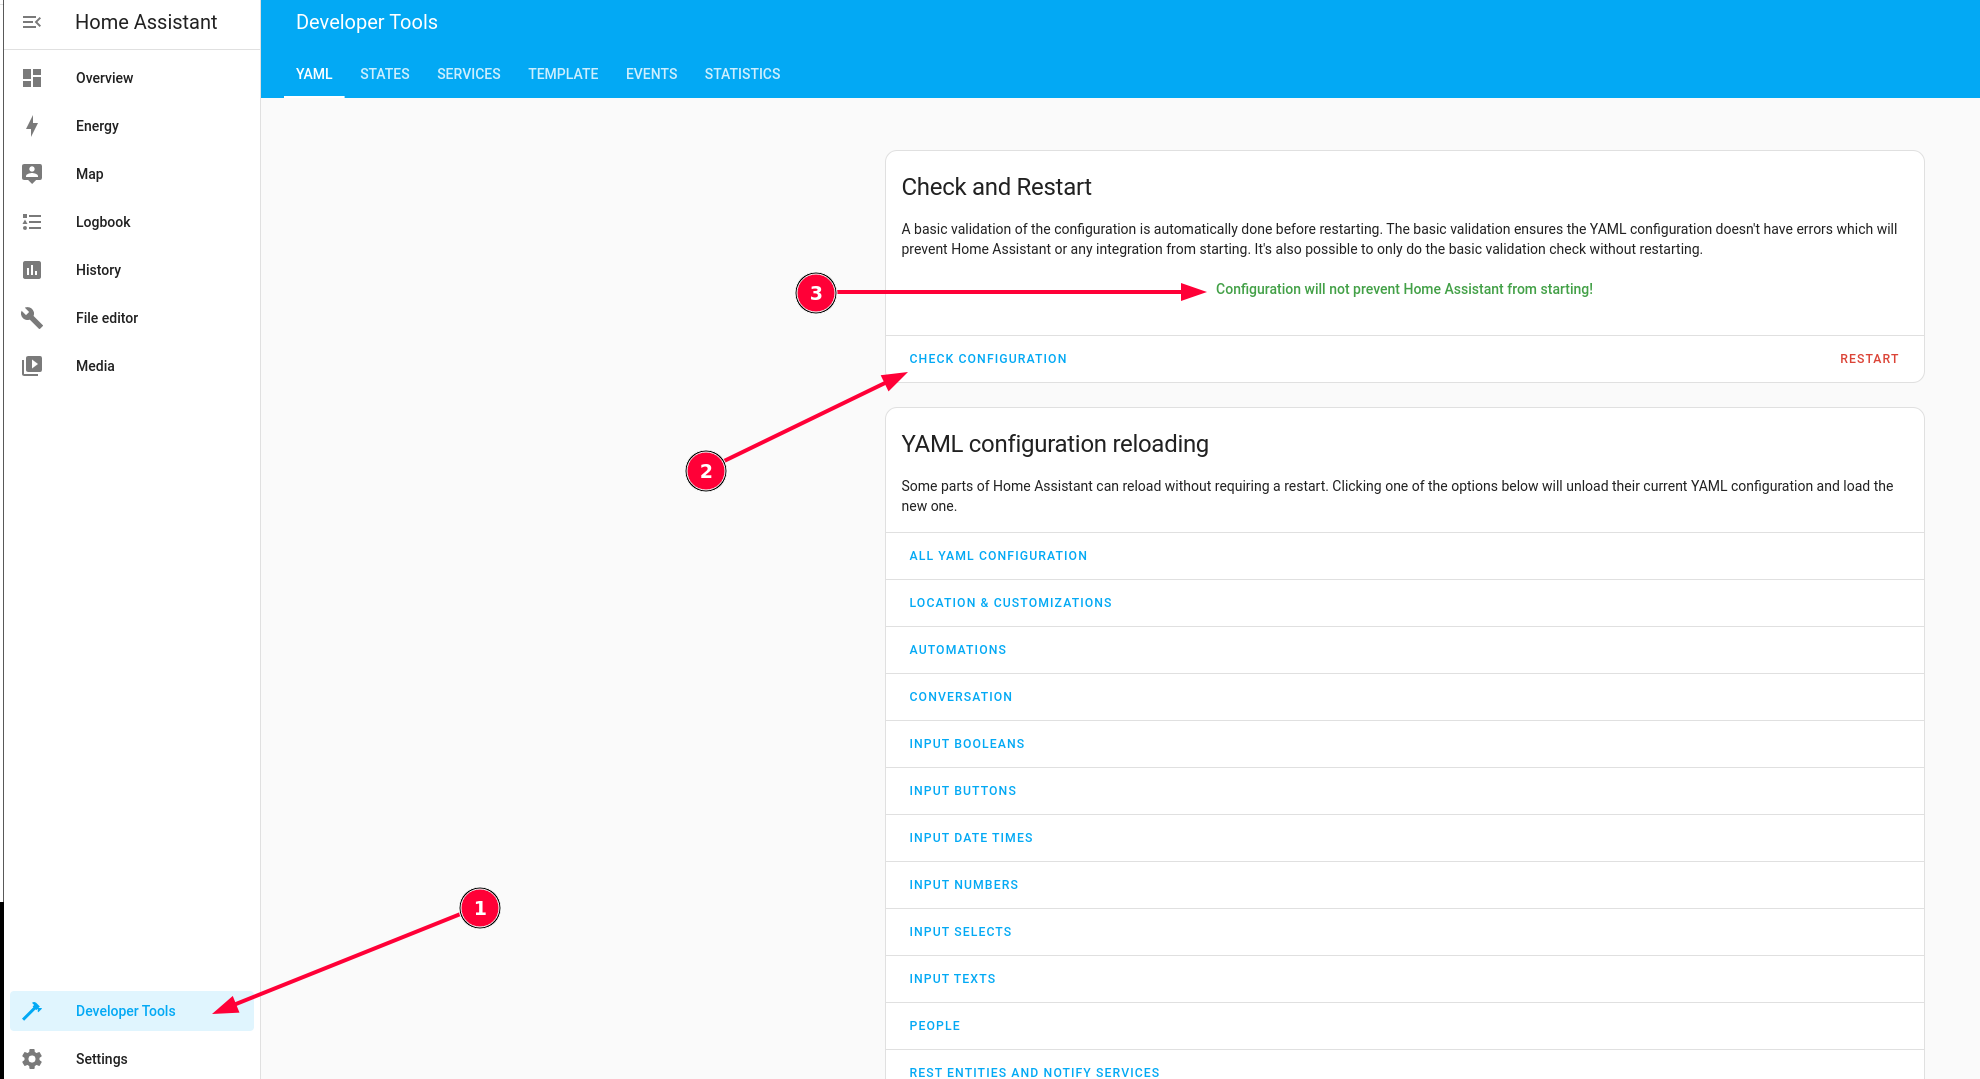
If everything is ok, you can click on "RESTART" and select "Quick Reload"

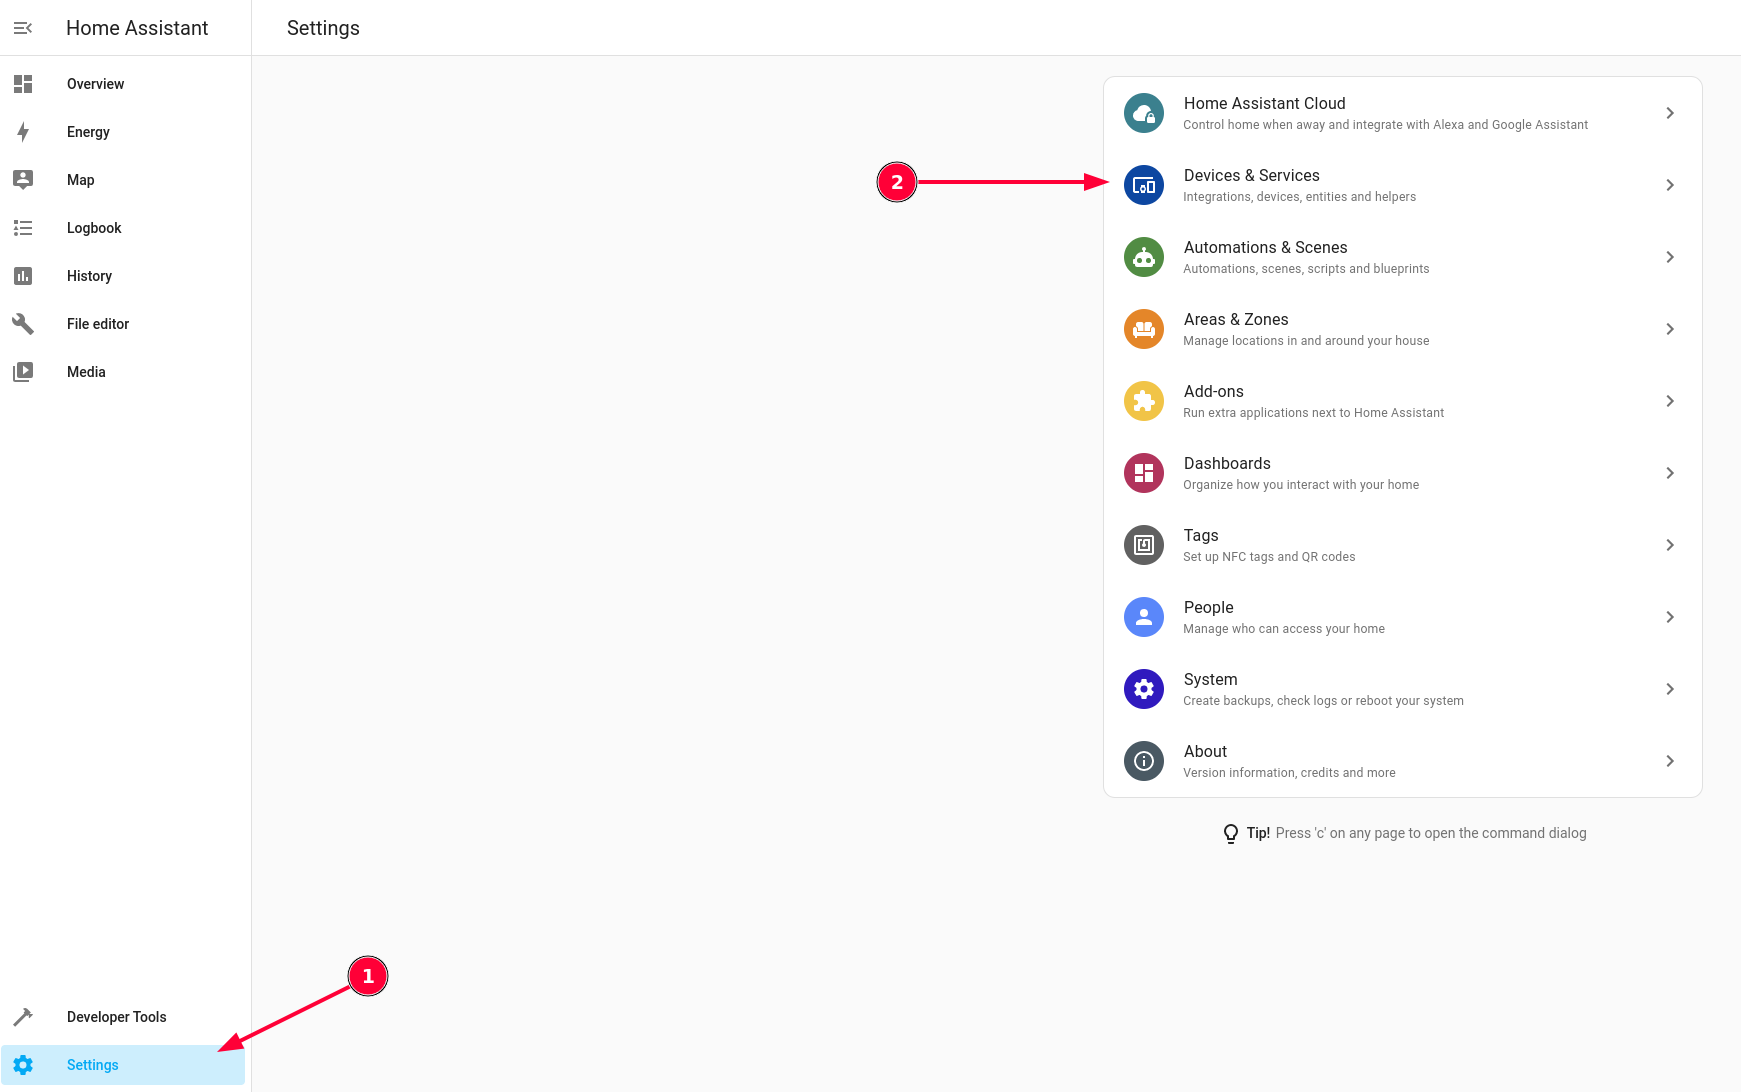
The next step is to allocate a zone/area to the sensor data. For this Click on "Settings" and then "Devices and services"
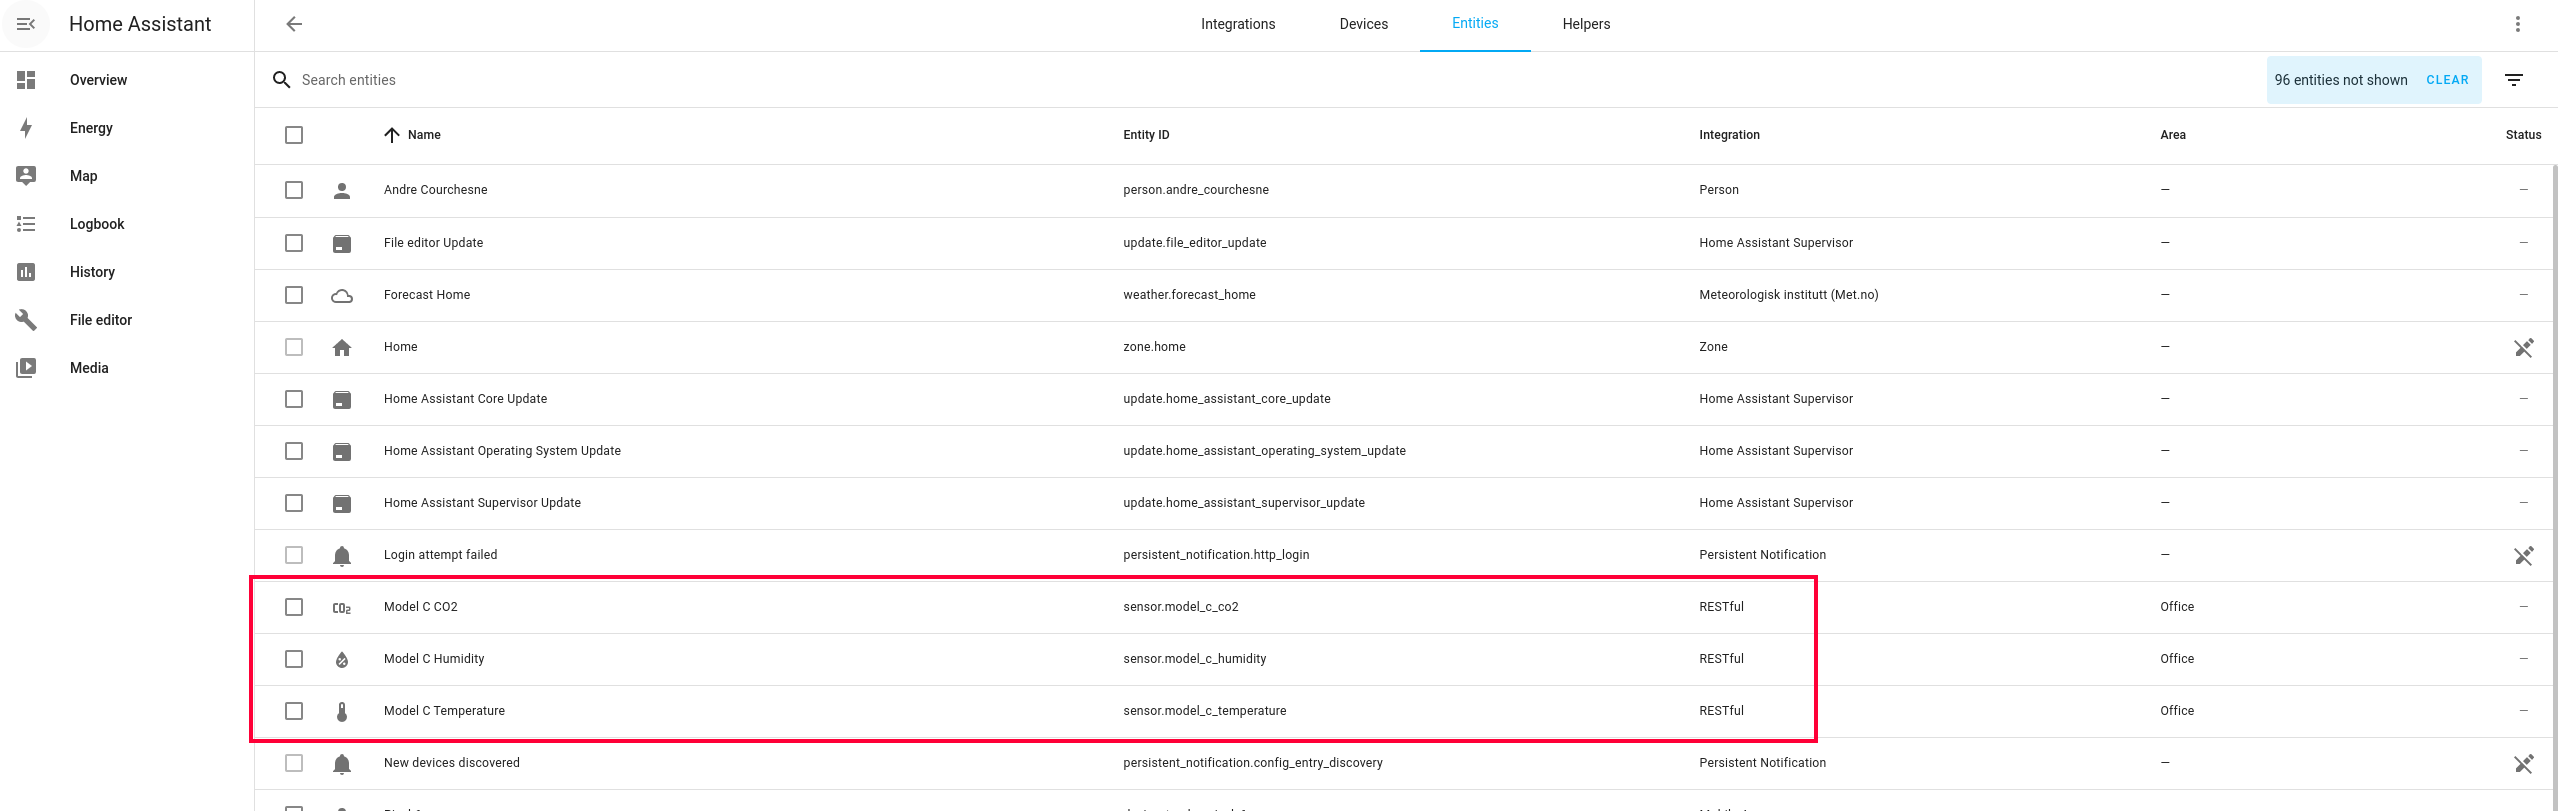
At the top click on "Entities" and you should see the sensor data available:
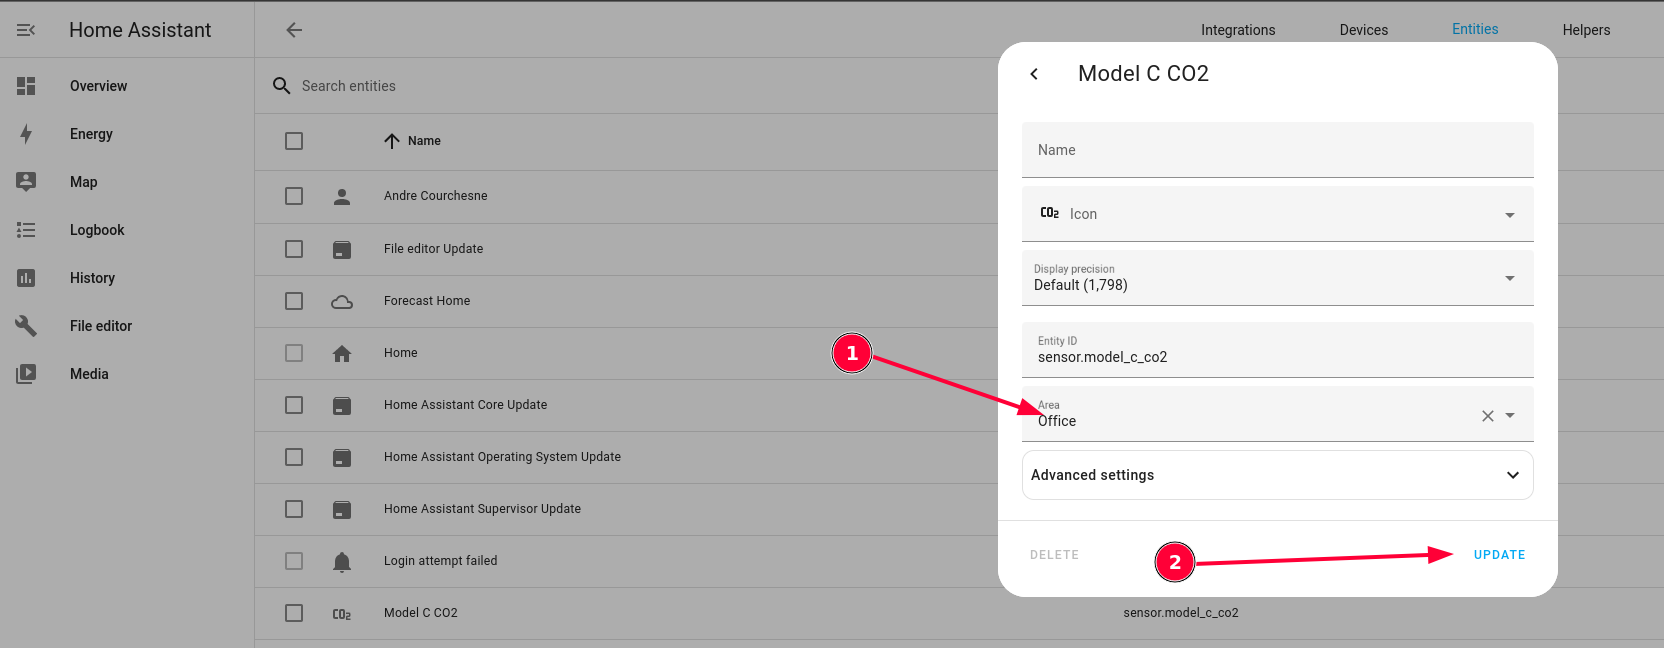
Click on each and then on the "gear" icon

Then select an area and click on "Update"
Your sensor values should now show in your dashboard for the area/zone you selected. You can also add graphs and gauges like shown below:

Note that your sensor must be connected to a Wi-Fi network, have internet access and be properly configured in the portal for your HomeAssistant server to be able to fetch the data.
Did you know that VisiblAir Model E and E-Lite have a local API that you can use to get the instantaneous state and measurement from the sensor?
This API can be activated on your sensor by going to the Configuration menu, tapping on the "Data handling options" and checking the "Local API" checkbox.
Following this, when your sensor is connected to your Wi-Fi network, you can query its state. Here is an example using curl:
curl -s -H "Accept: application/json" -H "Authorization: Bearer MY_SENSOR_UUID_ALL_CAPS" http://MY_SENSOR_DNS.local:8080/stateMY_SENSOR_UUID_ALL_CAPS is your sensor UUID where all letters are capitalized.
MY_SENSOR_DNS is available in the Info screen of your sensor and will look like co2click-AABBCC where AABBCC are the last 3 bytes of your sensor UUID.
The API will return a JSON object that will look like this on Model E-Lite:
{
    "uuid": "MY_SENSOR_UUID_ALL_CAPS",
    "co2": 680,
    "humidity": 58,
    "temperature": 20,
    "pm01": 0,
    "pm03": 0,
    "pm05": 0,
    "pm10": 2.219000101,
    "pm25": 2.328000069,
    "pm50": 0,
    "pm100": 2.328000069,
    "pressure": 1020.398614,
    "voc": 98,
    "firmwareVersion": "1.5.1",
    "model": "E-Lite",
    "pcbVersion": 0,
    "isCharging": true,
    "isACIN": true,
    "battVoltage": 3.913000107,
    "battPct": 71.26999664
}
You can use this to perform automation of more advanced functions.
Hope you enjoy our sensors, and make sure to subscribe to our mailing list to receive more news like this.